This article will talk about how to enable VT on MSI computer and motherboard through BIOS.
Restart the computer. When the screen is on, press the key prompted on the screen repeatedly. For desktops, if there is no prompt, try pressing the "F2" or "Del" key repeatedly to enter BIOS; as for laptop, try pressing the " Fn+F2" or "Del" key for the BIOS entry.
Note: If none of them work, you can also try pressing "Esc", "F8", "F9", "F10", "F11" or "F12". For laptops, just try pressing "Fn+Esc", "Fn+F8", "Fn+F9", "Fn+F10", "Fn+F11" or "Fn+F12".

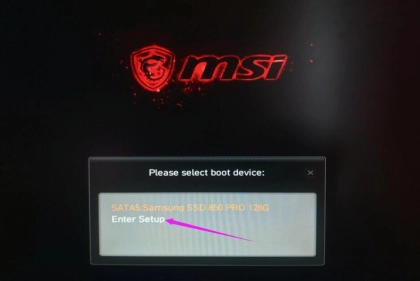
If the selection box shown below appears, click Enter Setup
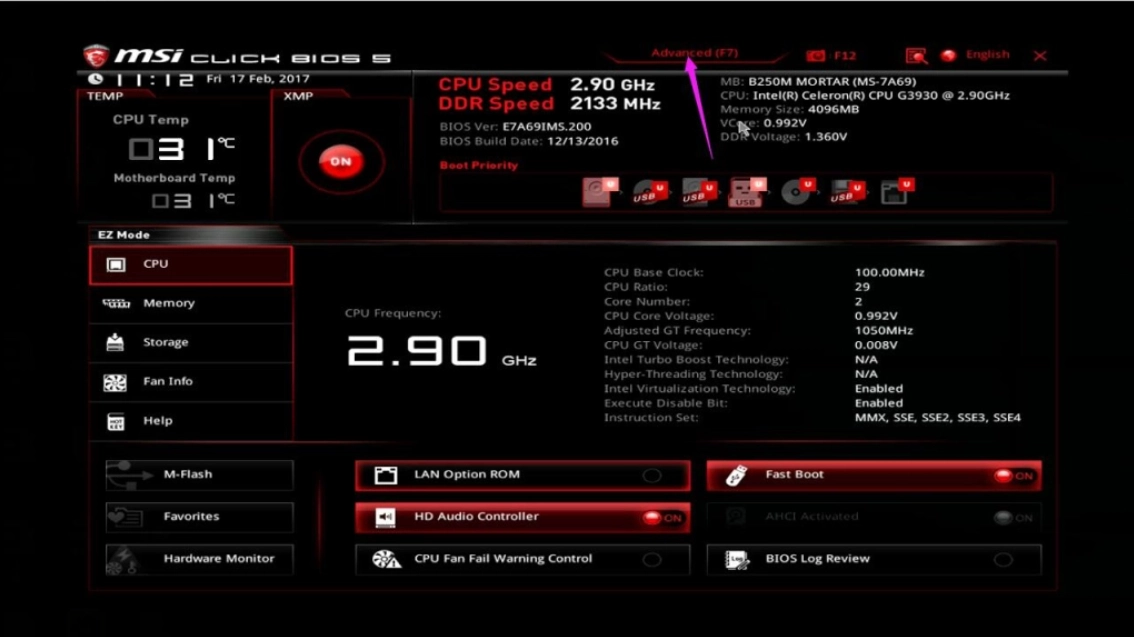
After entering the BIOS interface, press “F7” to enter the Advanced mode/EZ Mode.
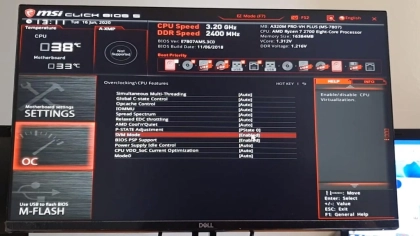
Click Overclocking settings.

Scroll down to the bottom, and then click CPU Features.
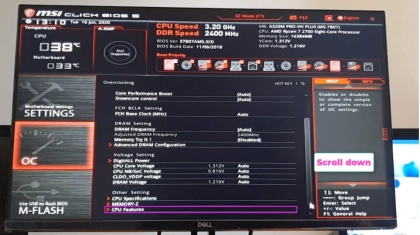
Scroll down to the bottom, and then click CPU Features.
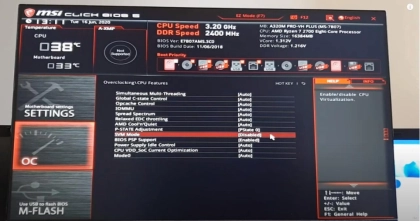
Find SVM Mode / Intel Virtualization Tech and switch from Disabled to Enabled. After switching it, press "F10" to save and exit.